Make a Middle Ages Dictionary!
I know many home-educating parents are not big fans of projects. Especially if they involve much time and are messy, right? But even if projects are time-consuming, you’ll be amazed at how much learning takes place as your children are “soaked” in a subject by taking the time to make something.
I remember to this day making an illustrated children’s poetry book when I was in middle school, cover and all. I was so proud of that thing. I still have it somewhere.
You’d be surprised, but these are the things that bring your children’s home education to life. Each time your children looks at their projects or show it to Dad or Grandma, they not only feel proud of their accomplishments, they also review what they learned creating it!
If projects are new to you, this is a painless one to start with, and you can make it as simple or “ornate” as your kids would enjoy.
First, choose and define words from the Middle Ages
Learning a subject’s vocabulary is essential to learning about any subject. Having your student find his or her vocabulary words and research their meanings will increase his/her understanding of the Middle Ages.
Editor’s Note: Some of our posts contain affiliate links to books and tools we have used and loved. Should you make a purchase using one of our affiliate links, we could make a small commission on the purchase at no extra cost to you. Thank you for supporting us in this way!
And this principle can be applied to many other time periods or topics as well. There are many terms in Adam of the Road that relate to items or activities specific to the Middle Ages.
Each time your student discovers a medieval term in his reading or vocabulary word lists, have him include it in his dictionary. You might challenge him to find as many words as possible and offer a small incentive if he reaches a certain number of words.

Your Child’s Middle Ages Dictionary can be Simple or Detailed according to Age and Ability
This project can be as simple or elaborate as you like. So if you have a student who is adamantly not artsy-craftsy, you may have him make this dictionary as a list on regular notebook paper and keep it in his history notebook. Alternatively, you may choose to have him incorporate artwork, computer clip art, or even make a cover for it. (See directions below in Part 2.)
Many of the time-specific words encountered in Adam of the Road and other Middle Ages reading can be found in a regular dictionary. But some of them require a little more research. An online encyclopedia or the following links to online medieval glossaries can help.
Note that we have not checked out every word in these glossaries, and we always advise you to supervise your students on the Internet!
Your student may use lined or unlined paper for this project, or, if she can type, she may key in her words and definitions into a spreadsheet program where they could then easily be sorted into alphabetical order. If that is not an issue or if your student would rather write, decide how you want to break up the alphabet. Maybe two pages for A-C, D-F, etc.
Your student can use notebook dividers or tabbed cardstock to separate sections. As your student completes his daily reading for this unit, have him keep an ongoing list of medieval terms and their definitions.
In the first chapter of Adam of the Road, many words are included describing monastic life, including nones, matins, prime (times of prayer), abbot, and abbey.
In this way, continue to have your student(s) identify and add specific Middle Ages terms to his dictionary.
Additional Middle Ages Vocabulary Worlds
Also, if you are using our Middle Ages-1 Lesson Plans, have your student include words from his vocabulary list:
- surcoat
- mantle
- minstrel
- heraldry
- portmanteau
- alms
- squire
- knight
- siege
- liege
- lanneret
- tiltyard
- quintain
- monk
- abbot
- franklin
- burgess
- chivalry
- plowman
- almonry
- parchment
- prior, priory
- evensong
- nobles
- knights
- prime
- matins
- comfit
- cotte
There will be other words throughout the book and other reading selections for the Middle Ages unit that your student can include in your student’s dictionary.
Make your Middle Ages Dictionary More interesting with Illustrations
If your middle-schooler enjoys hands-on projects, encourage him to make a more elaborate book. He may want to intersperse his book with drawings pertaining to the middle ages, such as:
- drawings of a knight, king, queen, monk, minstrel
- illustrations depicting scenes from Adam of the Road or other Middle Ages reading
- diagram of a castle
- illustration of some of the words in his dictionary, such as tools, weaponry, clothing items…
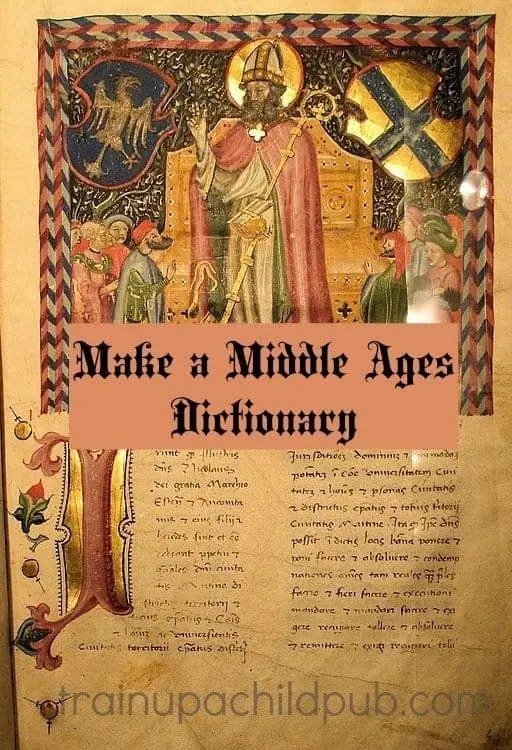
- a title page similar to the one in the above illustration after a crash course in a little calligraphy
After your student has added all the words to the dictionary, it is time to make the cover!
Your students can read about medieval books and look at some pictures of one here at the Metropolitan Museum for inspiration!
Make the Cover of Your Middle Ages Dictionary
If you choose the simple approach but want a cover, use a 1/2-inch 3-ringed view binder. And have your student decorate the cover insert with a drawing or computer clip art. (Search for clip art by using terms such as knight, castle, monastery, and medieval.)
Alternatively, if your student wants to create a more involved cover for his dictionary, he could make his own cover. Directions for a detailed, older student are below.
Start with two thick pieces of stiff cardboard measuring about 9″ x 12″ and a piece of contact paper measuring 21 inches long by about 15″ wide. (He will also need glue, two pieces of blank 8 1/2″ x 11″ white paper, a ruler, scissors and a stapler. If your stapler isn’t strong enough and you need a heavy-duty stapler, have your local Office Depot or Staples help with that part.)
1. Fold the contact paper in half loosely (before removing the backing!) to find the middle.
2. Open the paper again and lay it out lengthwise, with the colored/patterned side down.
3. Place the cardboard side by side on the wrong side of the contact paper in a portrait (not landscape) direction, allowing about a pencil width between the pieces of cardboard.
4. The cardboard should have about an inch margin of contact paper above the top and about two inches on the bottom. Trim the four corners of the contact paper to make neater corners once they are folded.
Take a breath and a short break before continuing. This is detailed work!
5. Remove the cardboard and carefully remove the backing of the contact paper.
6. Lay the contact paper out as before, with the right/patterned side down, and place the two pieces of cardboard evenly, side by side, on top of the sticky side of the contact paper, with a pencil-width margin between the pieces.
7. Carefully and neatly fold the top and bottom margins of the contact paper over the cardboard. Start with the middle and work your way out to the sides. Carefully and neatly fold the side margins over the cardboard.
8. Glue a blank sheet of unlined white paper over the ends of the contact paper inside each side of the book cover. (These are called endpapers.)
9. Take the stack of dictionary papers and make sure they are in order. Line up the stack, and place it in the middle of the book, centering it on top and bottom with the cardboard pieces. Ensure the left margin of the stack is in contact with the center margin of the contact paper.
10. Close the book cover and staple at least three times down the length of the fold, making sure you are stapling all of the papers inside the book.
11. Decorate the cover of the book by writing a title in permanent ink and adding stickers or gluing on beads/yarn, etc. Feel free to lightly pencil in the title first to ensure you have it spaced correctly before you do it with permanent ink.
Making a Middle Ages Dictionary is a great way to solidify your student(s) knowledge of the Middle Ages. And even better, you can adapt this lesson to any book or time period you are learning about! Please share this lesson with your friends using the sharing buttons under my signature below! Many thanks!
Happy Creating,
![]()
