How to Make a Lapbook!
Learning how to make a lapbook and mini-books is a game-changer!
The best part of watching homeschool moms learn how to make lapbooks is seeing some ‘traditional textbook curriculum” moms learn that hands-on projects such as mini-books and lapbooks are a simple way to bring your kids’ homeschool education to life. Especially if your children love color, texture, and crafts. And not only are lapbooks fun for kids, but they also give you the opportunity to integrate subjects, which according to learning research, is one of the best ways to learn.
And whenever you are using more effective learning methods, they save time. Saving teaching time gives you more time for meal prepping, throwing in a load of laundry, or just cuddling your kids! Homeschool more effectively and you’ll have time to get everything else done, too.
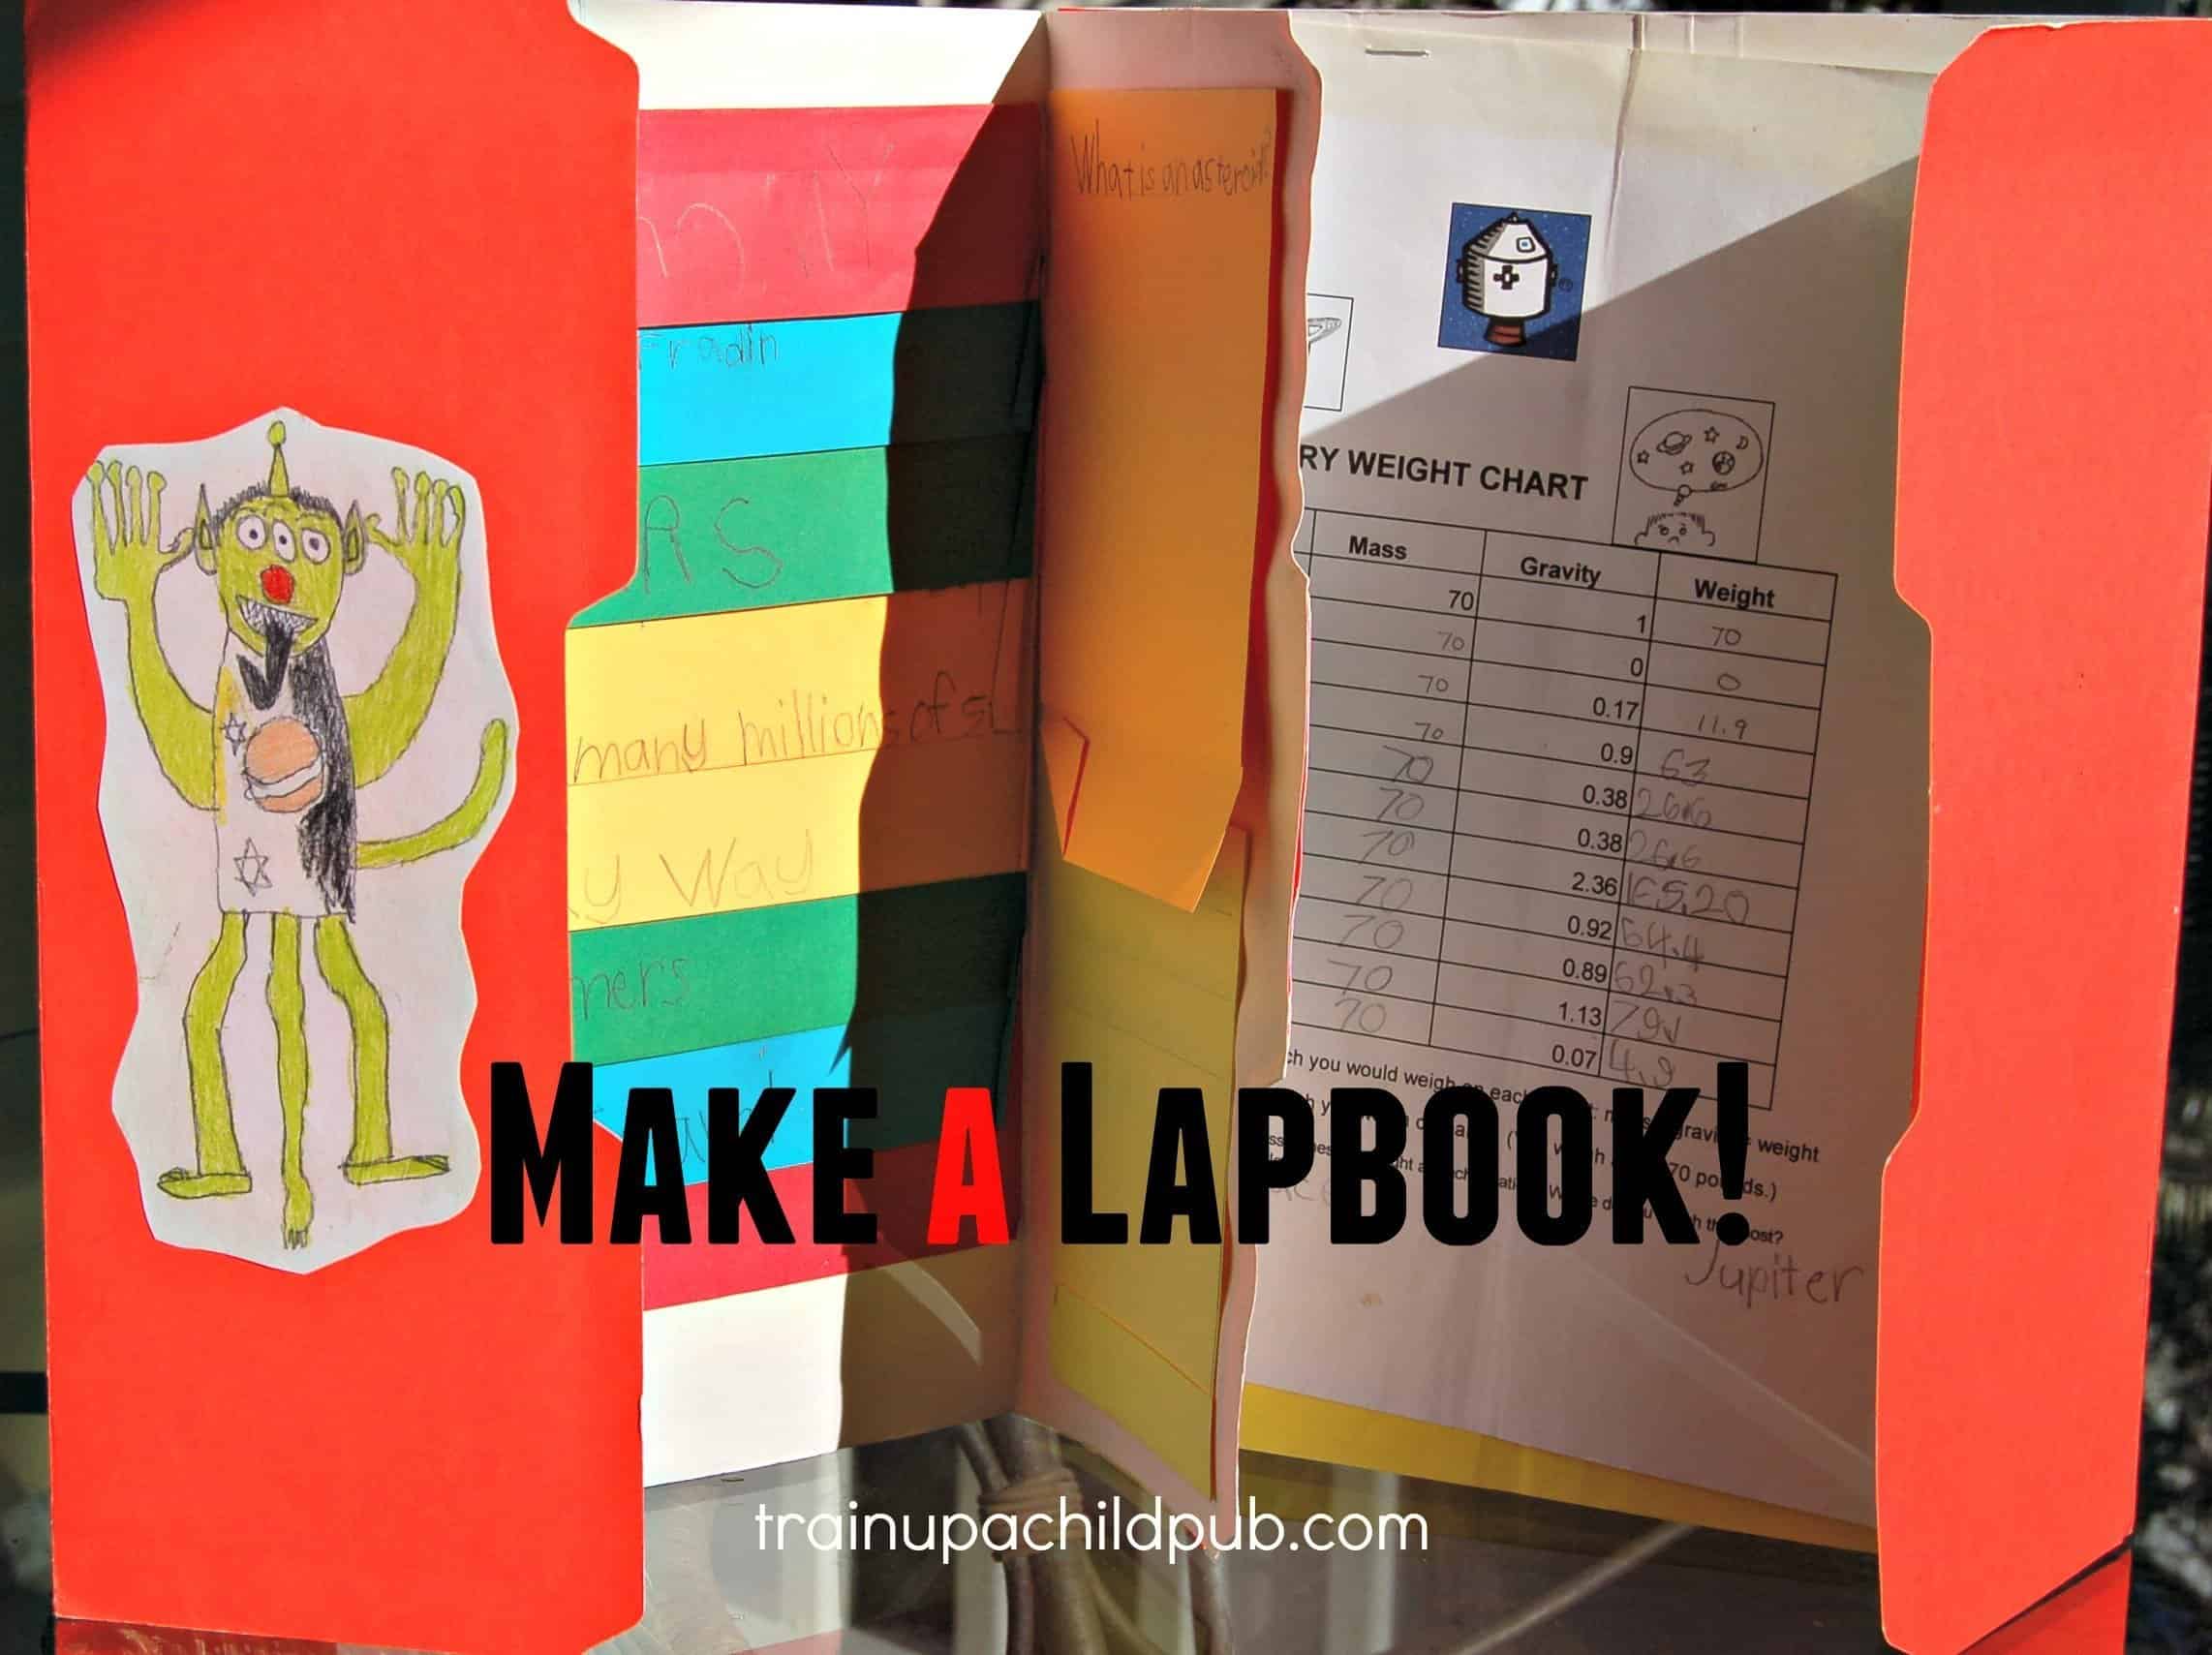
Look how many subjects we used in my son’s space lapbook:
- Science: the topic was outer space. To complete this lapbook, he had to read about planets, gravity, the sun, the U.S. Space Program, and the moon.
- Language Arts: my son wrote a summary of one of the books he read in the layered lapbook (the colored flaps)
- Language Arts: there are single flaps in the book that have vocabulary words and phrases about space on the outside, then you lift up the flap to see the definitions he wrote on the inside.
- Math: he had to figure out how much he weighed on different planets and on the Earth’s moon.
- Fine Arts: he not only drew his idea of an alien (pictured above), but he also had to draw our Solar System’s sun with a sunspot.
And according to science, it’s always a good idea to add a colorful and creative hands-on activity whenever you can squeeze one in. Another benefit: graphic organizers such as lapbooks can be much less intimidating to a reluctant writer than staring at a blank page.

Here’s a very simple mini-book that a kindergarten (with a little writing help) or elementary student can make.
How to make a flower parts mini-book/lapbook
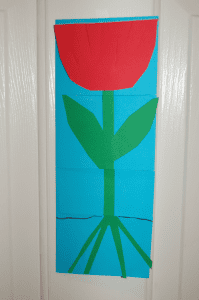
Directions for how to make a Flower Parts Mini-book/lapbook:
1. Using one single piece of 8 1/2 x 11-inch colored paper, hold the base piece of paper vertically, then fold it in half lengthwise.
2. Out of contrasting paper colors, construct a simple flower clearly showing the petals, leaves, stem, and roots, as shown in the top picture above.
3. After gluing the flower to the top half of the folded paper, cut through the flower and the top half of the paper, to the fold. Make three cuts so that the flower, leaves, stem, and roots each have their own section.
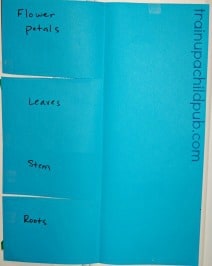
4. On the inside of the flaps, label each section, as shown in the bottom picture above.
5. For an elementary student, you can add to this by having them cut out another piece of light-colored paper that’s the same size as the right half of the paper shown above (the right side without the cuts). Have your student write a short description of each flower ‘part’ on this separate piece of paper and then glue it onto the lapbook. (You might have to help with this part if you have a newer writer.) You could also make this copy work for your child.
So how do you make the base of a lapbook, like the one shown at the top of this post and below?
Here’s the cover:
When you learn how to make a lapbook, you first learn that the base is constructed of two or more manila folders, glued or stapled together, that will form various flaps and “pages.”
These pages and flaps can house mini-books, photos, drawings, vocabulary words, maps, and more. Anything you can think of, actually.
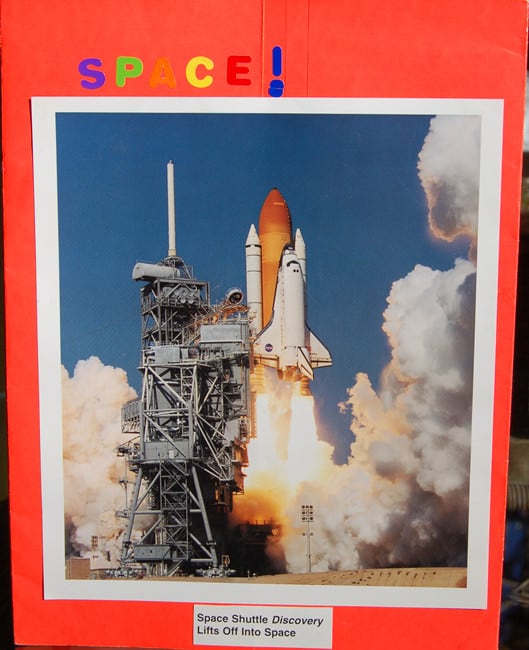
By the way, we wrote to NASA to get some beautiful space photos (for free!) to put on the cover.
And the buy-in for my son making this lapbook was getting to draw an alien.
It’s all in the marketing, y’ know.
You can see his alien in the photo at the top of this post. =D
Detailed Directions for making the lapbook base:
1. Take two file folders, and lay them open vertically on the table in front of you.
2. One at a time, take the outside edges of each file folder and fold them in towards the center-fold. Crease well, then let them open again.
3. Glue together the sides of each folder that are next to each other (that you just folded toward the middle). Voila! That is all there is to it – you can make lapbooks bigger by gluing on more folders or attaching additional flaps inside.
Below you can see what it looks like opened up.
As you can see, inside the lapbook there is space for vocabulary, illustrations, charts, book reports, clip art, and anything else your study includes.
The multicolored mini-book you can see on the left-hand side is a favorite of ours. It’s called the “layered-look book.” Find directions in our favorite resources for making mini-books for several subjects below!
Editor’s Note: This post contains affiliate links to resources we have used and loved over our homeschooling years! If you buy anything we recommend, we might make a small commission that helps fuel our coffee habit, at no extra cost to you.
Resources with loads of ideas and instructions for how to make mini-books!
Do you have a subscription to Notebooking Pages yet? If you do, you already have some mini-book templates that you can print and use to make the “insides” of your lapbooks! You can get to the mini-book template pages here.
If you don’t, you’re missing out. They are already-done pages you can use no matter what subject or topic you are studying. You may buy the pages separately as you need them, or even better, you can pay for a lifetime membership and use it for all of your kids, homeschooling or not. Debra (homeschool mom of 9) gives you a super generous free download just so you can try them out.
Books


I like the layered-look mini-books the best. I like them because they allow students to do a fair amount of writing depending upon the number of pages your book contains. And children don’t feel like they are doing so much writing because they just do a little at a time.
So it’s much less intimidating than that big blank sheet of paper because it’s divided into many small sections!
Additional benefits of making lapbooks
Lapbooks are:
- hands-on and visual, maximizing other learning modes
- provide students an automatic review of the material contained in their lapbook, every time they look at their creation or show it to someone else
- (as I mentioned earlier) used for studying almost any subject and easily integrating several subjects, maximizing learning
- able to entice reluctant writers because they are divided into many smaller sections and are less intimidating than one huge, blank piece of paper
- used as an assessment tool, especially when assigned with an accompanying rubric outlining what you want your student’s lapbook to contain
- used for all ages, kindergarten through high school
And lapbooks are like any other graphic organizer. Any time your children organize information visually, they are building a foundation for advanced writing skills! How can you use lapbooks in your homeschooling this year?
![]()
P.S. If you’d like some additional ideas on how to bring your kids’ education to life (without losing control of your house), click on the link to read more.
Hi Dana, when I read this, I had trouble connecting with one of the links of the other resources.
By the way, I love what you are doing here with lapbooks (and missions)!
Hi Kelly,
I’m sorry you found a link not working! Thank you for letting me know. Update: I removed the links to these other resources as they broke once too often. And thanks for your encouragement!
God bless,
Dana
I’m very glad to have read this article. It has helped me gain a great deal of knowledge on lapbooks. I would love to read more of your practical articles!
Thank you! It looks as if you’re a preschool teacher. I’m so glad you enjoyed “How to Make a Lapbook,” and I hope you get a chance to use what you’ve learned soon. Thanks for visiting!